Showing posts with label Long Nails. Show all posts

Sunday, October 9, 2011

OPI Gettin' Miss Piggy With It

Good morning, Dear Reader!

I've been in the mood for a good red lately, so it seemed like a good day to show you OPI Gettin' Miss Piggy With It from the OPI Muppets.  On the nail, it turned out far better than it sounds: it's a clear base with powdery-fine red glitter and red and silver hex glitter.  The outcome looks like opaque stop sign red glitter nails with white glitter polka dots.

For the manicure, I used base coat, three coats of Gettin' Miss Piggy With It, and a coat of Addicted to Speed just because it was late.  This morning, I felt around the edges of my nails for any pieces of stray hex glitter overhanging an edge, then just filed off the part over the edge and added a coat of Sally Hansen Salon top coat to seal it and smooth out the glitter.  Without the second coat of top coat, it definitely would have been passably smooth and was far better than I'd anticipated, but I really like perfectly smooth.  Once it dried, I took pictures in the sun.

OPI Gettin' Miss Piggy With It
OPI Gettin' Miss Piggy With It Nail Polish, Three Coats

Here's a closer look at the glitter in it.

OPI Gettin' Miss Piggy With It Glitter
OPI Gettin' Miss Piggy With It Nail Polish, Close Up of Glitter

There's no way to show you in a still picture just how reflective this glitter is, so I'll tell you.  In low-ish indoor lighting, it completely glows, and I think even in office lighting this one would catch attention from across the room.  It's really stunning, and I'd completely prepared myself for a disappointment since fine glitters often don't build up very well.  With the first coat, I definitely didn't see the potential it had because the glitter looked sparse, the second coat looked almost like this, and I added the third to finish covering a few barer spots.  Gettin' Miss Piggy With It is unequivocally a keeper for me, and it's really an exceptional red for the holidays.

I can chalk up another OPI Muppets success with Gettin' Miss Piggy With It, and that's all there is to tell you this morning.  Until next time, Dear Reader, love and nail polish to you!

Edited to add a note on removal: I really can't overstate how tough this was to remove.  2.5 days without a chip or bit of wear translates into some tough polish.  Felt and acetone took five minutes per nail for the first three, then I soaked it off for about ten minutes.  However, removed bits of glitter were everywhere and required many hand washes.  Still totally worth it to me, but be prepared.


All Rights Reserved, Siobhan@The Nailphile. If you're reading this elsewhere, it's stolen from a real nail polish blog.

OPI Gettin' Miss Piggy With It

Good morning, Dear Reader!

I've been in the mood for a good red lately, so it seemed like a good day to show you OPI Gettin' Miss Piggy With It from the OPI Muppets.  On the nail, it turned out far better than it sounds: it's a clear base with powdery-fine red glitter and red and silver hex glitter.  The outcome looks like opaque stop sign red glitter nails with white glitter polka dots.

For the manicure, I used base coat, three coats of Gettin' Miss Piggy With It, and a coat of Addicted to Speed just because it was late.  This morning, I felt around the edges of my nails for any pieces of stray hex glitter overhanging an edge, then just filed off the part over the edge and added a coat of Sally Hansen Salon top coat to seal it and smooth out the glitter.  Without the second coat of top coat, it definitely would have been passably smooth and was far better than I'd anticipated, but I really like perfectly smooth.  Once it dried, I took pictures in the sun.

OPI Gettin' Miss Piggy With It
OPI Gettin' Miss Piggy With It Nail Polish, Three Coats

Here's a closer look at the glitter in it.

OPI Gettin' Miss Piggy With It Glitter
OPI Gettin' Miss Piggy With It Nail Polish, Close Up of Glitter

There's no way to show you in a still picture just how reflective this glitter is, so I'll tell you.  In low-ish indoor lighting, it completely glows, and I think even in office lighting this one would catch attention from across the room.  It's really stunning, and I'd completely prepared myself for a disappointment since fine glitters often don't build up very well.  With the first coat, I definitely didn't see the potential it had because the glitter looked sparse, the second coat looked almost like this, and I added the third to finish covering a few barer spots.  Gettin' Miss Piggy With It is unequivocally a keeper for me, and it's really an exceptional red for the holidays.

I can chalk up another OPI Muppets success with Gettin' Miss Piggy With It, and that's all there is to tell you this morning.  Until next time, Dear Reader, love and nail polish to you!

Edited to add a note on removal: I really can't overstate how tough this was to remove.  2.5 days without a chip or bit of wear translates into some tough polish.  Felt and acetone took five minutes per nail for the first three, then I soaked it off for about ten minutes.  However, removed bits of glitter were everywhere and required many hand washes.  Still totally worth it to me, but be prepared.


All Rights Reserved, Siobhan@The Nailphile. If you're reading this elsewhere, it's stolen from a real nail polish blog.
Tuesday, September 27, 2011

Cute Party Wear Nail Polish Fashion

The Dress Color Matching Orange Nail Designs for Girls


Purple Color Glitter Nail Pictures

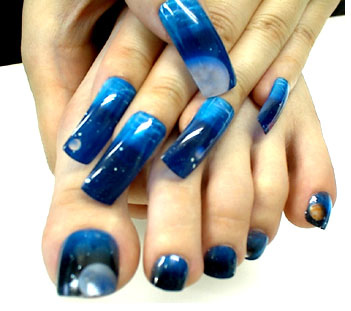
Hands and Feet Long Nail Art Design Blue Color

Violet Color Nail Design

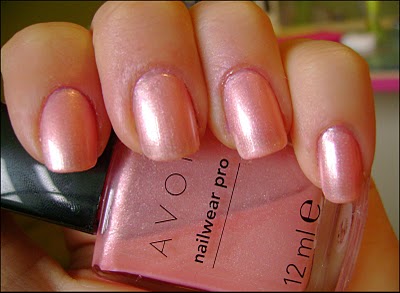
Pink Color Nail Wear

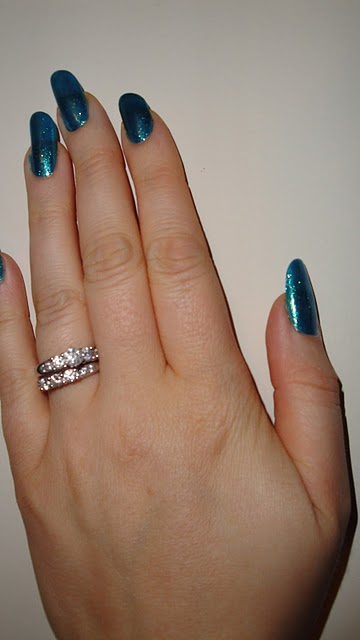
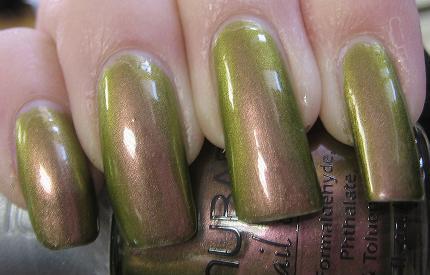
Peacock Green Nail Arts

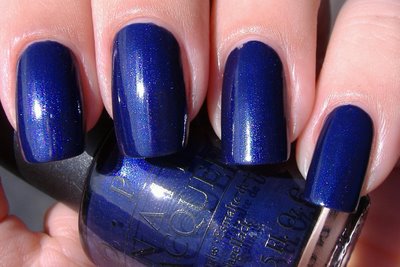
Dark [Sea] Blue Long Nail Arts

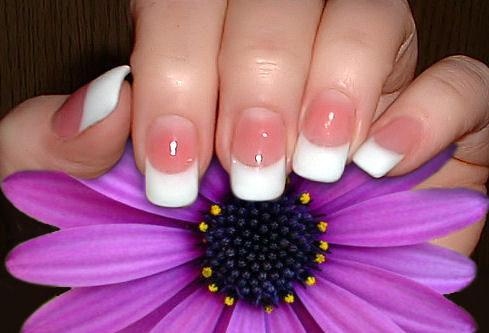
Half White Nail Design

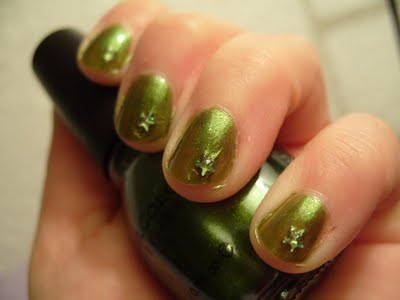
Apple Green Color Short Nails with Star

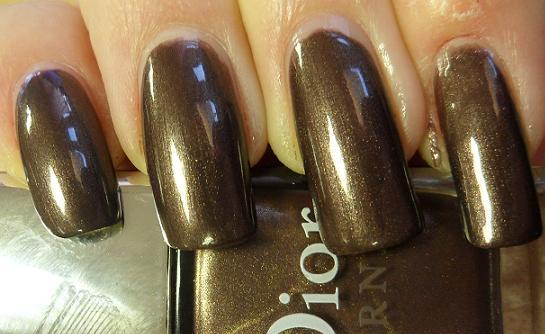
Dark Brown Nail Gallery

Green Color Festival Nail Art Designs

Tuesday, September 20, 2011

Young Girls With Very Long Nails Arts Pictures

Multi Colors Nail Art Gallery


Cute Nail Arts

Blue and Brown Colors Big Nail Designs

Black and white Nail Designs

Blue Floral Nail Designs

Colorful Nail Designs


Nail Designs

Dark Blue Nail Arts

Flower Nail Designs

Monday, July 18, 2011

Zoya Dree

Good morning, Dear Reader!

Continuing with the Zoya Smoke Collection for Spring 2011, today I have Dree for you.  Before I move on to Dree, I had one quick note about the removal of Zoya Cynthia to pass on to you.  You know how dark blues often leave Smurf fingers in their wake?  Well, I removed Cynthia with the pink Beauty Secrets acetone-based remover, and there was literally zero staining of my skin or nails, so that's a huge plus for a dark blue.

Back to Zoya Dree... That's the olive green creme in the Smoke Collection, and my initial reaction was not particularly thrilled just because I have olive green cremes.  Once I started applying it, I became far more enthusiastic about it for several reasons.  First, the shade is a good one - it's not as yellow as RBL No More War nor as washed out as Chanel Khaki Vert.  The application is very good, although a little bit slow for me since the brush is small and my nails are not, but that comes down to making the color change take 14 minutes instead of 8-10, which is completely reasonable.  Dree's dry time is exceptionally good - when I was painting the seventh nail, I bumped the freshly painted third nail and only made a tiny fixable mark in it, and it was completely dry very fast using everyday base and top coats for me.  The polish is very pigmented so two thin coats were all that I needed and it dries very shiny.  Here's Zoya Dree with base and top coat in the sun.

Zoya Dree Nail Polish, Two Coats

That's what I know about Zoya Dree.  So far so good on the Smoke Collection, and I'm looking forward to the other four.  Until next time, Dear Reader, love and nail polish to you!


*This polish was provided by the manufacturer for review, that fact has no bearing on the review itself.

Zoya Dree

Good morning, Dear Reader!

Continuing with the Zoya Smoke Collection for Spring 2011, today I have Dree for you.  Before I move on to Dree, I had one quick note about the removal of Zoya Cynthia to pass on to you.  You know how dark blues often leave Smurf fingers in their wake?  Well, I removed Cynthia with the pink Beauty Secrets acetone-based remover, and there was literally zero staining of my skin or nails, so that's a huge plus for a dark blue.

Back to Zoya Dree... That's the olive green creme in the Smoke Collection, and my initial reaction was not particularly thrilled just because I have olive green cremes.  Once I started applying it, I became far more enthusiastic about it for several reasons.  First, the shade is a good one - it's not as yellow as RBL No More War nor as washed out as Chanel Khaki Vert.  The application is very good, although a little bit slow for me since the brush is small and my nails are not, but that comes down to making the color change take 14 minutes instead of 8-10, which is completely reasonable.  Dree's dry time is exceptionally good - when I was painting the seventh nail, I bumped the freshly painted third nail and only made a tiny fixable mark in it, and it was completely dry very fast using everyday base and top coats for me.  The polish is very pigmented so two thin coats were all that I needed and it dries very shiny.  Here's Zoya Dree with base and top coat in the sun.

Zoya Dree Nail Polish, Two Coats

That's what I know about Zoya Dree.  So far so good on the Smoke Collection, and I'm looking forward to the other four.  Until next time, Dear Reader, love and nail polish to you!


*This polish was provided by the manufacturer for review, that fact has no bearing on the review itself.

Friday, July 15, 2011

Sephora by OPI Rock His World

Good morning, Dear Reader!

This morning I changed my polish to Sephora by OPI Rock His World, a deep red vampy creme.  I'd planned to add on to Orly Frolic, but I used my nails to pry something yesterday and chipped the polish on a couple of them when I did it.  I don't think it was the polish - the only two nails with any chips or wear were the two I pretty much pried chips off of, so please don't let that put you off to Frolic.

I chose Rock His World because I have something early in the day tomorrow for which I want my nails to look nice, and while I have no reason to downplay them I also didn't want to go over the top, so a standard shade seemed like a good choice.  In the bottle, Rock His World looks like a kind of dark brick red, but once dry on the nail it's darker and less brown than in the bottle.  It applied really, really well (as the picture shows - there was no cleanup after application), but it did require three coats to completely even it out.  That's not unexpected - I associate shades like this with being kind of blotchy unless care is taken to keep them even.  This is Rock His World in sunlight after drying with a coat of Nubar Diamont.

Sephora by OPI Rock His World
Sephora by OPI Rock His World Nail Polish, Three Coats

Although nothing unique or unusual, I like this color quite a bit.  I was fine with the bottle color, but I'm far more enthusiastic about Rock His World after it's had a chance to dry on the nail.  Given how it applied, whenever I get around to weeding out duplicate colors, I'll be keeping Rock His World.  It's just a really good version of a solid basic color, and you can't go wrong with that.

That's Sephora by OPI Rock His World and just about all there is to tell you about today, so until next time, love and nail polish to you!

Sephora by OPI Rock His World

Good morning, Dear Reader!

This morning I changed my polish to Sephora by OPI Rock His World, a deep red vampy creme.  I'd planned to add on to Orly Frolic, but I used my nails to pry something yesterday and chipped the polish on a couple of them when I did it.  I don't think it was the polish - the only two nails with any chips or wear were the two I pretty much pried chips off of, so please don't let that put you off to Frolic.

I chose Rock His World because I have something early in the day tomorrow for which I want my nails to look nice, and while I have no reason to downplay them I also didn't want to go over the top, so a standard shade seemed like a good choice.  In the bottle, Rock His World looks like a kind of dark brick red, but once dry on the nail it's darker and less brown than in the bottle.  It applied really, really well (as the picture shows - there was no cleanup after application), but it did require three coats to completely even it out.  That's not unexpected - I associate shades like this with being kind of blotchy unless care is taken to keep them even.  This is Rock His World in sunlight after drying with a coat of Nubar Diamont.

Sephora by OPI Rock His World
Sephora by OPI Rock His World Nail Polish, Three Coats

Although nothing unique or unusual, I like this color quite a bit.  I was fine with the bottle color, but I'm far more enthusiastic about Rock His World after it's had a chance to dry on the nail.  Given how it applied, whenever I get around to weeding out duplicate colors, I'll be keeping Rock His World.  It's just a really good version of a solid basic color, and you can't go wrong with that.

That's Sephora by OPI Rock His World and just about all there is to tell you about today, so until next time, love and nail polish to you!

Wednesday, July 13, 2011

Orly Flirty

Good morning, Dear Reader!

This morning I have Orly Flirty to show you from Orly's Happy Go Lucky Collection for Summer 2011.  It's the pink shimmer in the release, and it's perfect.  It's an almost neon pink that's extremely well pigmented with two coats going on easily and providing opaque coverage, it dries very quickly (when I started the second coat, the first was dry with no waiting around time in between), and the color and finish are fabulous together.  I only had cloudy weather for a picture, but Flirty was up to the task.  Please excuse the felt lint on my thumb which the proof read has revealed to me...

Orly Flirty
Orly Flirty Nail Polish, Two Coats

One sort of strange thing is that once the polish is totally cured, the surface of my nails feels kind of like they're coated in ceramic.  Flirty is not the first polish that dried to feel this way and it's not a problem in any way, it just feels funny in a not-bad way (not especially good either, more like interesting).

I think I'm so smitten with Flirty because it has a strong shimmer and this shade of pink makes me happy, so not everyone should expect to be as enamored with it as I am.  I'm aware that some find pink nail polish to be a bit boring and safe, but it's really high on my list of favorites just the same.  I guess some things are traditional because they work well...

That's Orly Flirty and the news of the day, so until next time, love and nail polish to you!

Orly Flirty

Good morning, Dear Reader!

This morning I have Orly Flirty to show you from Orly's Happy Go Lucky Collection for Summer 2011.  It's the pink shimmer in the release, and it's perfect.  It's an almost neon pink that's extremely well pigmented with two coats going on easily and providing opaque coverage, it dries very quickly (when I started the second coat, the first was dry with no waiting around time in between), and the color and finish are fabulous together.  I only had cloudy weather for a picture, but Flirty was up to the task.  Please excuse the felt lint on my thumb which the proof read has revealed to me...

Orly Flirty
Orly Flirty Nail Polish, Two Coats

One sort of strange thing is that once the polish is totally cured, the surface of my nails feels kind of like they're coated in ceramic.  Flirty is not the first polish that dried to feel this way and it's not a problem in any way, it just feels funny in a not-bad way (not especially good either, more like interesting).

I think I'm so smitten with Flirty because it has a strong shimmer and this shade of pink makes me happy, so not everyone should expect to be as enamored with it as I am.  I'm aware that some find pink nail polish to be a bit boring and safe, but it's really high on my list of favorites just the same.  I guess some things are traditional because they work well...

That's Orly Flirty and the news of the day, so until next time, love and nail polish to you!

Monday, March 28, 2011

EZ Flow The It List

Good afternoon, Dear Reader!

I've been neglecting you because I've been neglecting my nails, I'm sorry.  I just wasn't up for dealing with another long removal and redoing this fake tip until I absolutely had to, and today I had to.  The old mani was nine days grown out and had a chip near a cuticle because I decided to tidy up my cuticles while taking a scalding hot bath a few days ago, and a bit of the gel came off when I did, so they weren't really looking too good.  Early this morning I got a call to set up a second interview for a position I really (really, really, really) want, and it's tomorrow morning, so the time had come to redo my nails.

The removal of the old mani was long again.  I did some more hunting for tips online and saw people say that the remover works better than acetone, so I used the remover that came packaged with it, but it was still pretty bad.  Since the Nubar removal was the easiest, what I did this time was use Nubar Gelicure products for nail prep, base, and sealer, and just the EZ Flow color gel in the middle.  This is my third time time using EZ Flow color gel, and I find that it shrinks in application quite a bit - both times before were with the whole EZ Flow system, so it doesn't seem like product incompatibility would be the problem here.  I worked around the shrinkage as well as I could, and the whole application, including one sculpted tip, was finished in under forty-five minutes (that's excluding the removal of the old one).

I went over a few options I had for what color to use this week (pretty easy since I don't have a ton of choices), and I found one I'm content with.  I considered a nice French, but vetoed it for this particular interview because it's a little on the girly side - the job's an IT team lead role, and girly just doesn't cut it.  I considered going with just clear since my nails are white enough to do that now, but I'm never comfortable with that and it would be distracting to me, and that thought led me to just wear something I'd be comfortable and confident in, which was a darker shimmery red from EZ Flow called The It List.  I know it's a bit bold, but I'll still be very understated overall - my clothes are the dressy IT choice of a charcoal skirt and a black sweater.

EZ Flow The It List
EZ Flow The It List Soak Off Color Gel
Looks like I got some towel lint on there after I washed my hands when I finished, so we'll all have to pretend we don't see that.  Otherwise, I'm pretty happy with how it turned out - it's familiar, not especially attention-grabbing, and so I'll be at ease wearing it.  The last thing I want to be thinking about for even a moment during the second interview for a dream job is my nails, and that'll be easy with this.

So that's the update for now, Dear Reader.  Until next time, love and nail polish to you!

EZ Flow The It List

Good afternoon, Dear Reader!

I've been neglecting you because I've been neglecting my nails, I'm sorry.  I just wasn't up for dealing with another long removal and redoing this fake tip until I absolutely had to, and today I had to.  The old mani was nine days grown out and had a chip near a cuticle because I decided to tidy up my cuticles while taking a scalding hot bath a few days ago, and a bit of the gel came off when I did, so they weren't really looking too good.  Early this morning I got a call to set up a second interview for a position I really (really, really, really) want, and it's tomorrow morning, so the time had come to redo my nails.

The removal of the old mani was long again.  I did some more hunting for tips online and saw people say that the remover works better than acetone, so I used the remover that came packaged with it, but it was still pretty bad.  Since the Nubar removal was the easiest, what I did this time was use Nubar Gelicure products for nail prep, base, and sealer, and just the EZ Flow color gel in the middle.  This is my third time time using EZ Flow color gel, and I find that it shrinks in application quite a bit - both times before were with the whole EZ Flow system, so it doesn't seem like product incompatibility would be the problem here.  I worked around the shrinkage as well as I could, and the whole application, including one sculpted tip, was finished in under forty-five minutes (that's excluding the removal of the old one).

I went over a few options I had for what color to use this week (pretty easy since I don't have a ton of choices), and I found one I'm content with.  I considered a nice French, but vetoed it for this particular interview because it's a little on the girly side - the job's an IT team lead role, and girly just doesn't cut it.  I considered going with just clear since my nails are white enough to do that now, but I'm never comfortable with that and it would be distracting to me, and that thought led me to just wear something I'd be comfortable and confident in, which was a darker shimmery red from EZ Flow called The It List.  I know it's a bit bold, but I'll still be very understated overall - my clothes are the dressy IT choice of a charcoal skirt and a black sweater.

EZ Flow The It List
EZ Flow The It List Soak Off Color Gel
Looks like I got some towel lint on there after I washed my hands when I finished, so we'll all have to pretend we don't see that.  Otherwise, I'm pretty happy with how it turned out - it's familiar, not especially attention-grabbing, and so I'll be at ease wearing it.  The last thing I want to be thinking about for even a moment during the second interview for a dream job is my nails, and that'll be easy with this.

So that's the update for now, Dear Reader.  Until next time, love and nail polish to you!

Tuesday, February 22, 2011

Sephora by OPI Celibacy Club and Sue vs Shue

Good morning, Dear Reader!

Today I have a manicure using two of the Sephora by OPI Glee mini set exclusives, Sue vs Shue and Celibacy Club.  I got the mini set on Valentine's Day when Sephora was giving out a free bottle of Sephora by OPI Access 24/7 with any order - I've had my eye on that one forever, and I was interested in the minis, so now they're here.

When I opened the set's box to check out the polishes, I noticed Celibacy Club, described by Sephora as a diamond top coat.  That was the one I was least interested in before seeing them in person - I figured, another fine silver glitter top coat can't be too different than any other.  It looked like it might be holographic when I was sizing it up, so I set it aside to try out.  I looked at what to put it over, and I chose Sue vs Shue, a pretty standard navy blue shimmer (which I wouldn't be astounded to hear was just the regular $OPI navy rebottled).

Sue vs Shue applied very well, with one coat being just shy of enough for even coverage.  I used two coats, then added one coat of Celibacy Club before finishing it off with a coat of Poshe.  For this, I wish I had sunlight, but I don't.  I took about seven billion pictures to get one that would even hint at the glory that is Celibacy Club, and this is as close as I could get in artificial light.  It's pretty impressive at full size, so give it a click to see a full screen version.

Sephora
Sephora by OPI Celibacy Club over Sue vs Shue, Glee Mini Set Exclusives
Here's a blurry picture from the same batch that shows the colors reflected by the glitter pretty well.

Sephora by OPI Celibacy Club over Sue vs Shue
Sephora by OPI Celibacy Club over Sue vs Shue, Blurred to Show Glitter
The real kicker is that this is how the manicure looks in regular indoor light.  Truthfully, I'm a little bummed that Celibacy club isn't offered in full size.  It's the coolest polish I've seen from the Sephora by OPI line (and I'm a fan of $OPI despite the price tag), so selling it only as a limited edition mini seems like a waste of a dang good polish.

That's the scoop for today, Dear Reader.  Until tomorrow, love and nail polish to you!  

Sephora by OPI Celibacy Club and Sue vs Shue

Good morning, Dear Reader!

Today I have a manicure using two of the Sephora by OPI Glee mini set exclusives, Sue vs Shue and Celibacy Club.  I got the mini set on Valentine's Day when Sephora was giving out a free bottle of Sephora by OPI Access 24/7 with any order - I've had my eye on that one forever, and I was interested in the minis, so now they're here.

When I opened the set's box to check out the polishes, I noticed Celibacy Club, described by Sephora as a diamond top coat.  That was the one I was least interested in before seeing them in person - I figured, another fine silver glitter top coat can't be too different than any other.  It looked like it might be holographic when I was sizing it up, so I set it aside to try out.  I looked at what to put it over, and I chose Sue vs Shue, a pretty standard navy blue shimmer (which I wouldn't be astounded to hear was just the regular $OPI navy rebottled).

Sue vs Shue applied very well, with one coat being just shy of enough for even coverage.  I used two coats, then added one coat of Celibacy Club before finishing it off with a coat of Poshe.  For this, I wish I had sunlight, but I don't.  I took about seven billion pictures to get one that would even hint at the glory that is Celibacy Club, and this is as close as I could get in artificial light.  It's pretty impressive at full size, so give it a click to see a full screen version.

Sephora
Sephora by OPI Celibacy Club over Sue vs Shue, Glee Mini Set Exclusives
Here's a blurry picture from the same batch that shows the colors reflected by the glitter pretty well.

Sephora by OPI Celibacy Club over Sue vs Shue
Sephora by OPI Celibacy Club over Sue vs Shue, Blurred to Show Glitter
The real kicker is that this is how the manicure looks in regular indoor light.  Truthfully, I'm a little bummed that Celibacy club isn't offered in full size.  It's the coolest polish I've seen from the Sephora by OPI line (and I'm a fan of $OPI despite the price tag), so selling it only as a limited edition mini seems like a waste of a dang good polish.

That's the scoop for today, Dear Reader.  Until tomorrow, love and nail polish to you!  

Wednesday, February 16, 2011

Color Club Wicked Sweet Nail Polish

Good morning, Dear Reader!

After yesterday's swatchfest, I was surprised that I was up for changing polish this morning, but I was.  I really wanted to try out on of the Color Club Wicked Sweet colors, so I looked through them and the one I was most curious about was Wicked Sweet (the color - when the collection and color have the same name, I always have to think to specify!).  I really wanted to see how the coverage was, how the shimmer translated to the nail, and of course, exactly what the smell of Wicked Sweet would be.

Wicked Sweet applied well, but the polish is somewhat thin.  After the first coat, it looks like it'll take a zillion coats to be opaque, then the second coat makes it completely opaque.  Color Club's keeping me on my toes!  Although the shimmer is relatively understated in the bottle, on the nail Wicked Sweet glows.  Here's two coats in sunlight (I apologize for the wacky angles here).

Color Club Wicked Sweet
Color Club Wicked Sweet Nail Polish, Two Coats
I think it's absolutely gorgeous.  As for the fragrance, this is probably the most subtly scented polish I've used.  It does smell a lot like Juicy fruit gum, but like Juicy Fruit had about half the sugar, and I had to sniff within a few inches of my nails to catch it.  This one's definitely not so scented that it would offend.

I thought a little white Konad would perk this up well.  I wanted the polka dot pattern, but I ran into a dotting tool before the Konad plate, had a lazy moment, and used the dotting tool.  It's not bad, but I prefer the perfectly uniformly shaped and spaced dots that I get with Konad.

Color Club Wicked Sweet Nail Polish & Dots
Color Club Wicked Sweet Nail Polish with Dots
That's my nice smelling manicure for the day.  Until next time, Dear Reader, love and nail polish to you!